Clouds Text Effect in Photoshop
Let's take a quick look at the effect that we are about to create in Photoshop. The text will be transformed into a clouds text effect, better said a text that looks like it is made out of clouds. We will only need some simple Photoshop filters so nothing to complicated.

To create a clouds text in Photoshop we need a beautiful blue background to start with. This blue background will be our sky. So create a new layer, fill it with #4db0ff color and name it Sky Layer.
Add a new Text Layer and with the help of the Horizontal Type Tool write your text that you want. I will write "clouds" with Cooper Std font. You can choose whatever font you like, but I think it looks best on round fonts.
If you decide to use another font and you don't know how to install it check out this tutorial Install Font in Photoshop.

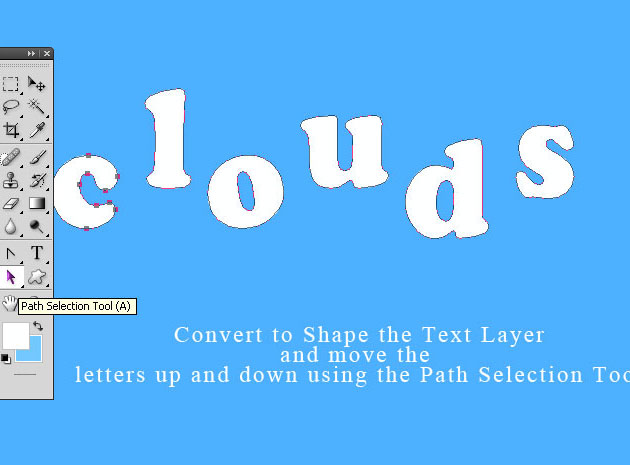
Right click on the Text Layer and Convert to Shape the text. Pick the Path Selection Tool, select the letters and move them up and down to look nicer.
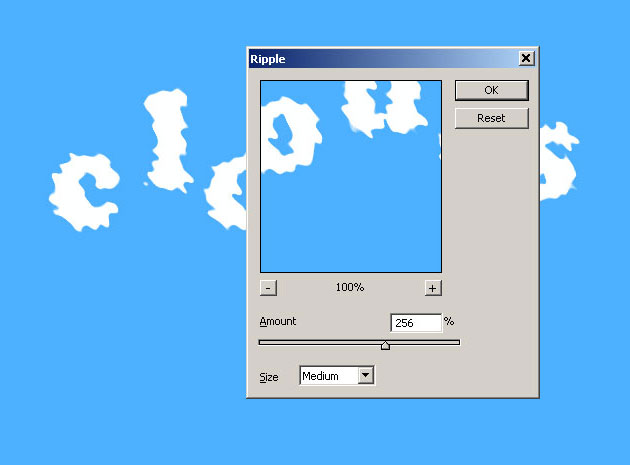
Select the Sky Layer and the Text Layer and press CTRL+E to merge the two layers. Go to Filter,Distort and choose Ripple effect with the following settings.
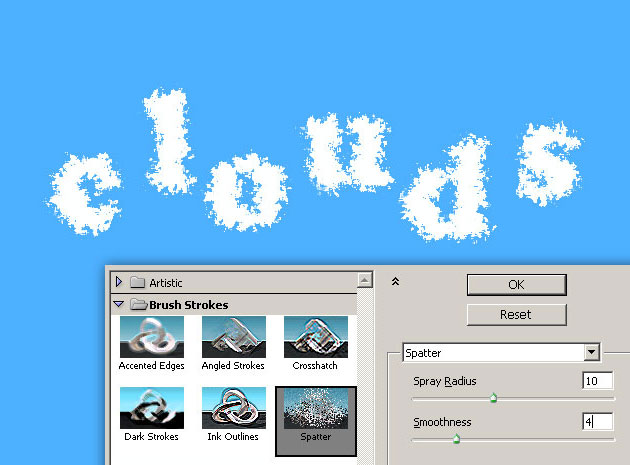
Go to the Filter menu again, this time choose Brush Strokes and from that list pick Spatter effect. The settings are 10 for the Spray Radius and 4 for the Smoothness. You can of course play with this settings to obtain interesting results.
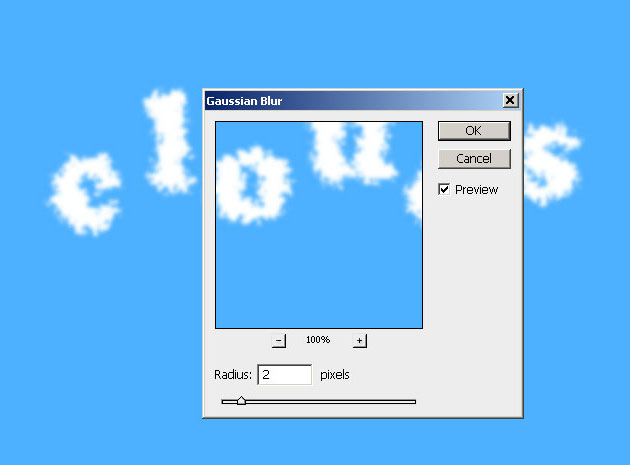
To make the text look more cloudy use the Gaussian Blur filter and you should obtain a similar result.
You can apply the Photoshop Filters that we've use in the previous steps one more time with different settings if you want to distort the text even more. You can also use some clouds brushes for the background to make it look more realistic. Remember that all this little details make the difference.